Navigate to Main Catalogs: There are 2 easy ways to navigate back to your main catalogs.
1) Clicking on the Design Tab at any time will bring you back to the Home menu.
2) The menu title bars just below the Design, View, and Parts List tabs gives you quick access to any of the previous menus, or Home.

Adding Products: From the Home menu, under “Step 2: Add Products,” simply click on the desired catalog button. For this example we will use the generic LiveStorage catalog (catalog availability based on licensing and authorization). Once inside the Generic Products menu, click on the Closet icon. Now you will see a variety of closet components to place in your room. Again, you are guided by the program with steps to place products in the necessary, correct order.
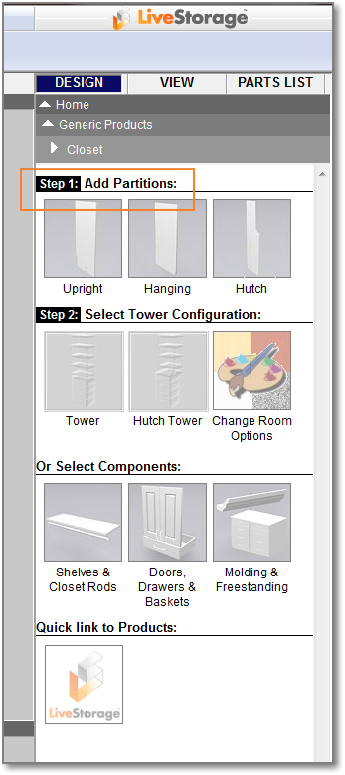
Before placing items in your design, be sure to select the wall you wish to place products on in the Select Wall window at the bottom of your screen. The selected wall will appear in yellow, and an arrow indicates which side of the wall you are adding products to.

For this example, we will click on the Upright icon to place a partition on the wall. Clicking on the icon opens an options window at the bottom of the menu, where you can specify the height, depth, and drill side for the partition.
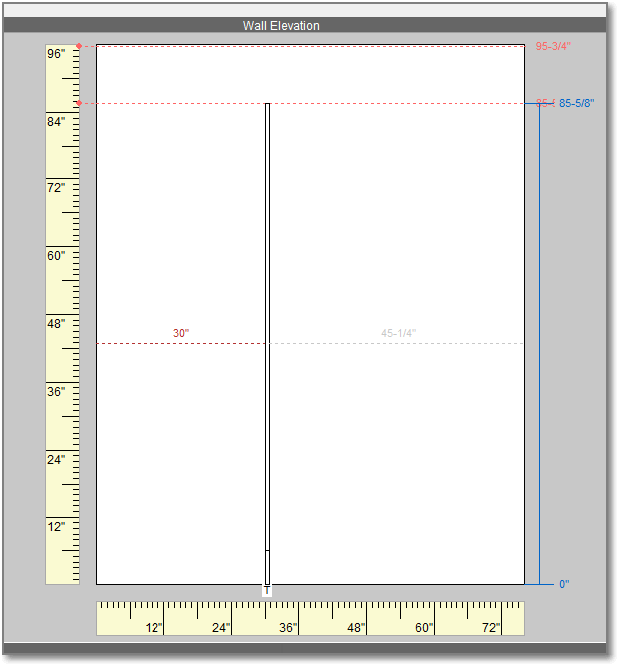
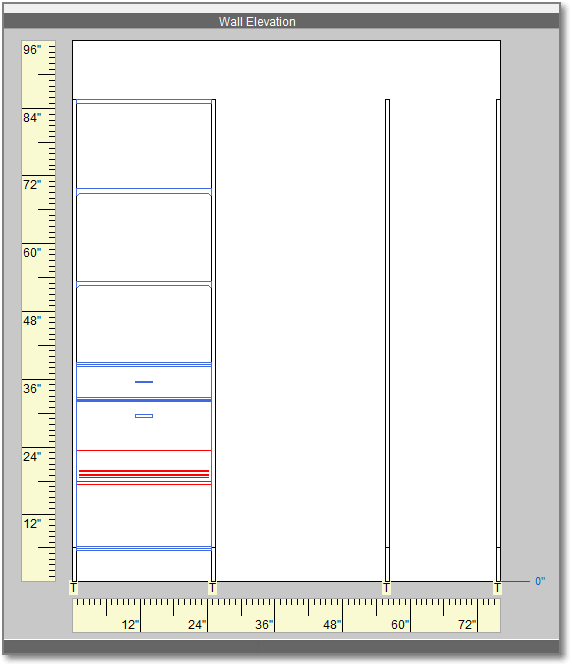
When placing the partition on the wall elevation shown in your work area, the measurement shown in red indicates an accurate placement measurement for the item, and will snap to the most common spacing. The grey measurement is simply to show the distance on the other (non-snapping) side of your item. To reverse which side the red snap measurement is on, simply press the space bar (as mentioned in the status bar at the bottom of your screen).
Place partitions in the desired locations, and then begin adding towers, shelves, rods, and more. The options window will appear at the bottom of the screen whenever you click on an item that can be changed before placement.
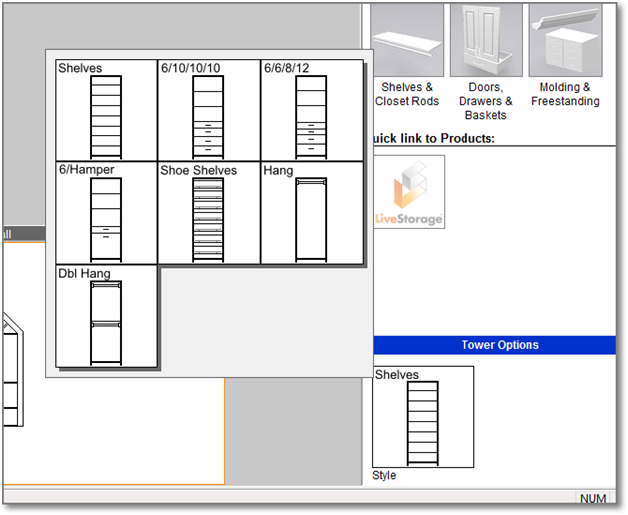
Adding Towers & Hutches : Click on the Tower icon, and in the options window at the bottom, click on the Style button to show the expanded selection of tower style options.
Snap: When a tower style is selected, move your cursor to the work area. Anywhere the tower can be placed (based on the spacing of partitions), it will snap to that location and appear blue. If a tower will not fit correctly between 2 partitions due to the components within the tower, and spacing of partitions, the tower will not snap into place, and will not turn blue.
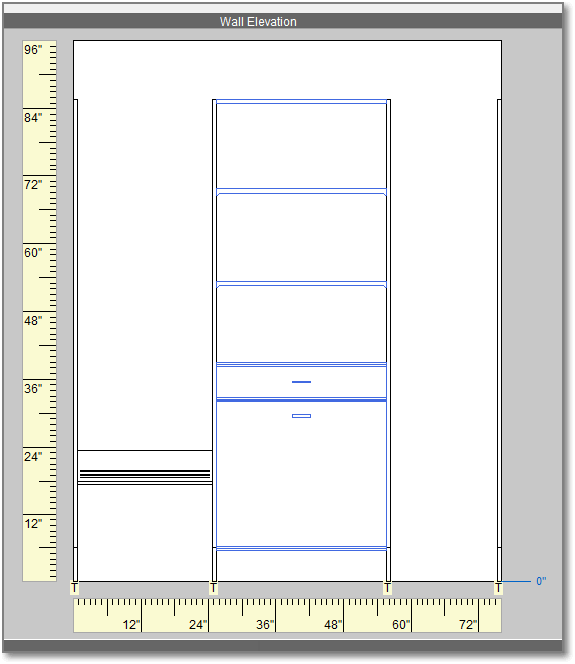
If placing a tower will replace another item in the design, that item will appear red, and will disappear from the design when the tower is placed.
Adding Shelves, Drawers, Doors, and Accessories: Explore submenus within the closet catalog to add a variety of items, including drawers, doors, shelves, baskets, accessories, and more. To edit any items you have added to a wall, simply click on the item in your work area. The selected item will appear yellow, and you will be presented with arrows to move or stretch the item, and an ‘x’ option to delete that item.
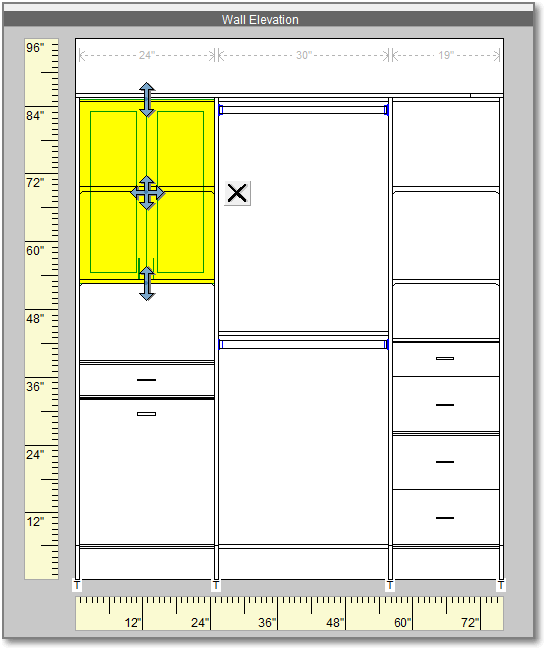
In this example, you can stretch the door height up or down by clicking and dragging the up/down arrows at the top or bottom. You can move the doors to a different location in your design by clicking and dragging on the four-way arrows in the center. You can delete the doors from your design by clicking the ‘x’ button to the right.