Tips & Tricks
Hidden Thickness Walls
At times, you may want items that are generally wall-attached to appear as if they are in the middle of a room. This can be achieved by drawing a wall with hiddenthickness (does not appear in the drawing) in your design.
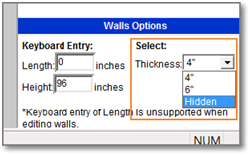
From the Home menu, click on the Draw Your Own Room icon. Select Walls, and view the options window at the bottom of the menu screen. In addition to manually entering the length and height of the wall, there is a drop-down selection for the wall thickness. Hidden is the third option.
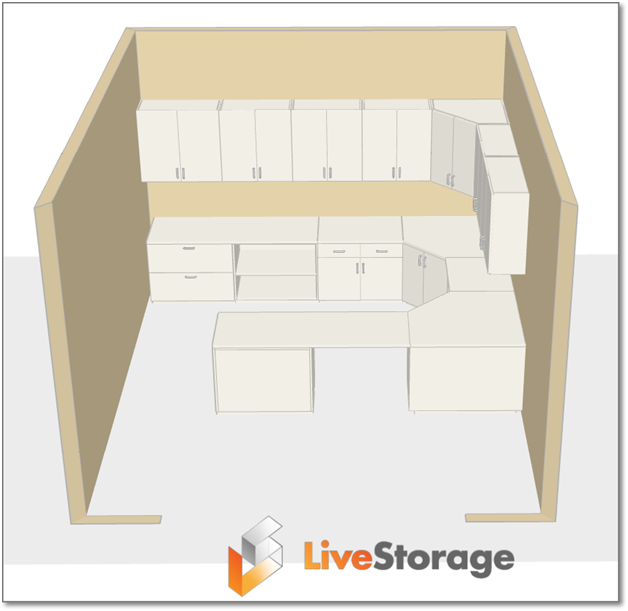
When drawn into a room, the hidden wall acts as any other wall as far as adding products, but is not visible in the 3D view or renderings (it is visible in the 2D overhead view). Here is an example in 2D and 3D of a hidden thickness wall with products attached, drawn into a room:

An example of the 3D Rendering with the hidden wall:
“Snapping” Tips:
When you create a design, many items are programmed to snap to common distances, to other objects, or to walls on either side of the object. As an example, we will look at upright partitions. When placing the partitions, a red measuring guide appears to one side of the partition (example 1). As you move your cursor to determine placement for the partition, you will notice that it automatically moves to certain standard distances, and the red measurement turns to a darker burgundy color (example 2).

To toggle the side of the partition that the red measuring tool appears on (the snap direction), simply press your space bar during the placement process. If you do not want the item to snap to any standard measurements, you can temporarily disable the snapping feature by holding the control key while placing the item.
Generic Box & Generic Cylinder:
The Generic Box and Generic Cylinder tools can be found from the Home menu, under Draw Your Own Room. These are very useful tools for portraying items in a room that are not sellable products, or items that already exist in a space that you need your design to work around (such as a water heater, or existing built-in millwork). These can also be used to portray sellable products which are not represented in the software currently. Conveniently, the generic box and generic cylinder are available in several standard product finishes, as well as medium gray and marble.
To use the generic box, start by clicking on the Generic Box icon. This opens the options window at the bottom of the screen.
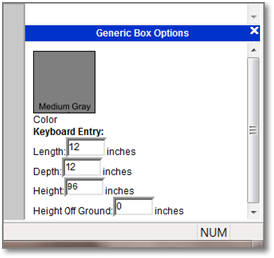
Click on the color swatch to expand a menu of finish options for the generic box you have created.
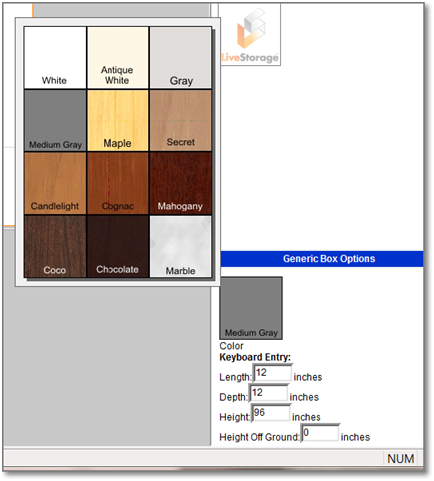
Then, under Keyboard Entry, you can specify the length, depth, height, and height off ground for the box. For a generic cylinder, the options are similar except there is a Radius option in place of length and depth.
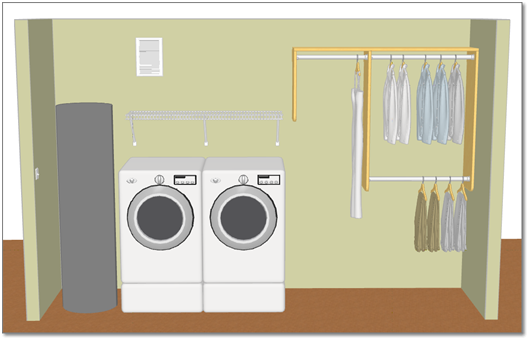
A generic box or cylinder is placed in your design as a freestanding object, from the overhead 2D view. Here, a generic cylinder is used to represent a water heater in a laundry room:
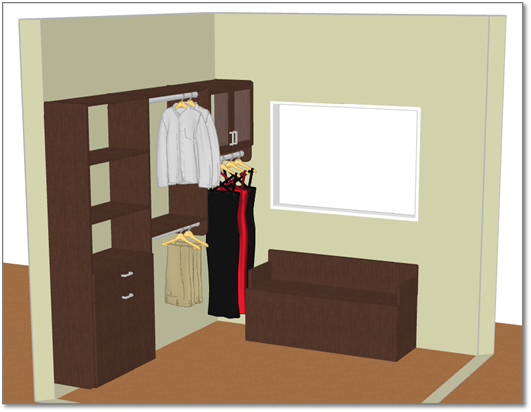
Here a generic box is used to represent a window seat in a walk-in closet:
Customizable Hot Buttons:
To quickly and easily navigate to your most frequently used menus or sub-menus, LiveStorage allows you to preset 10 Hot Buttons for 1-touch navigation. The F1 through F10 keys are your customizable hot buttons in this program.
How to set Hot Buttons:
• Navigate to a frequently used catalog or menu, for example, the closet shelves and rods menu.
• Simultaneous press “Control” + the desired F-key for this menu.
• Repeat this process for keys F1 through F10, using various menus that you want to reach frequently and easily (it is advisable to record a “cheat sheet” of which menus you have assigned to each F-key).
Once the hot buttons are set, no matter where you are in LiveStorage, you can now navigate to those menus with a single touch of the assigned F-key. These hot buttons can be re-assigned to a different menu anytime by simply pressing the control + F-key again while in the new desired menu.
*Note: The Hot Buttons feature is not available for Mac users at this time.
Non-visual and Custom Catalog Items:
LiveStorage allows you to add unique or custom line items to your orders, which are not found within any of standard LiveStorage menus. To do so, go to the Parts List in LiveStorage. On the right-hand side of the page, you will find buttons under “all Rooms,” as well as under each room in the project, labeled “Add Custom Line Item,” and “Add Catalog Item.” You will want to click on the buttons corresponding to the specific room you want the line item added to within your project.
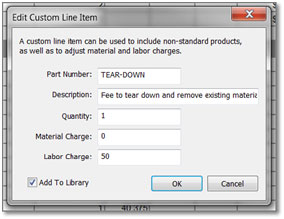
The Add Custom Line Item button launches a dialogue box which allows you to manually enter a part number, description, quantity, material charge, and labor charge for any item you want shown on your order. This can be used for items you sell which are not represented in any of the LiveStorage catalog menus, or to show a charge for various services such as tear-down fees, travel charges, etc. In the dialogue box, you may check the Add to Library box, which will save this custom item to your non-visual catalog, allowing you to access it easily in any projects.
Once you have added a custom line item to your catalog, this line item will also appear as an optional part in your Inventory Tool, so you can keep track of any on-hand quantities.
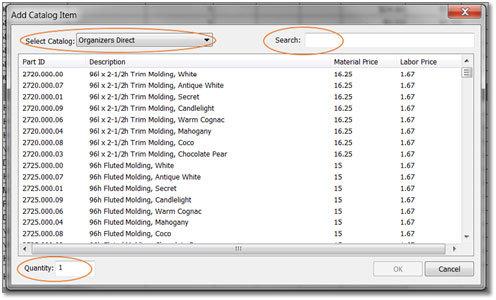
The Add Catalog Item button launches a dialogue box that is pre-populated with the following options:
• Any custom line items you have created, and chose to add to library.
• Any Organizers Direct items that are available for order, but not represented in the Organizers Direct catalogs within LiveStorage (applies to Organizers Direct dealers only).
In the Add Catalog Item window, start by selecting the desired option from the drop-down menu at the top (Organizers Direct, or Custom). Then simply highlight the item you wish to add to your order, enter the quantity desired in the lower left-hand corner, and click “Okay.” This item will now appear as a line in your parts list under the heading “Custom Line Items.” You will notice there is a red ‘X’ to the left of these lines, to be used in the event that you wish to delete a custom line item from your order. The search field in the Add Catalog Item dialogue box allows you to quickly find the item you are looking for by entering in the part number, or key words from the item description.